The Ultimate Boat Decommissioning Guide: How to Winterize Your Vessel
Introduction
Properly winterizing and decommissioning your boat is essential to safeguard your investment against freezing temperatures, corrosion, mold, and pest infiltration during the off-season. By following a systematic decommissioning workflow—spanning engine preservation, plumbing protection, electrical care, interior prep, and sailboat-specific steps—you ensure your boat remains in peak condition and ready for launch come spring.
Key Takeaway / TL;DR
Winterizing your boat requires stabilizing fuel, protecting internal engine blocks and plumbing lines with non-toxic marine antifreeze, disconnecting charged batteries, removing interior fabrics, and using proper hull supports.
How Do You Winterize a Boat Engine and Fuel System?
To winterize a boat engine, you must treat the fuel system, change the oil, flush the raw-water cooling block with marine-grade antifreeze, and coat internal cylinder walls with fogging oil. These steps prevent fuel oxidation, corrosion from acidic residue, and catastrophic engine block cracking caused by expanding frozen water.
- Stabilize and Fill Fuel Tanks: Add a marine-grade fuel stabilizer to your fuel tank. For outdoor storage, fill the tank to approximately 95% capacity to leave expansion room while preventing air condensation and water contamination. Run the engine for 15 minutes to distribute stabilized fuel throughout injectors and fuel lines.
- Change Crankcase Oil and Filters: Replace the engine oil and oil filter while the engine is still warm. Leaving contaminated, acidic oil in the engine during winter will corrode delicate internal components.
- Drain and Flush with Marine Antifreeze: Completely drain the raw-water cooling system on inboard or stern-drive engines. Run non-toxic, marine-grade propylene glycol antifreeze (the “pink” liquid) through the intake until it exits the exhaust.
Warning / Caution
Never use automotive ethylene glycol antifreeze. It is extremely toxic to marine ecosystems and aquatic life. Always use marine-grade propylene glycol.
- Fog Engine Cylinders: Spray fogging oil directly into the engine intake or spark plug cylinders to form an anti-corrosion seal over pistons and cylinder walls.
- Service the Lower Gearcase: Drain lower unit gear lube and check for a milky or discolored appearance—this signals a failed seal admitting water. Refill with fresh gear lube from the bottom drain port upward.
How Do You Protect Plumbing and Sanitation Systems from Freezing?
You protect boat plumbing and sanitation systems by thoroughly draining freshwater tanks and pumping non-toxic marine antifreeze through all lines, heads, and pumps. Leaving residual water in pumps or pipes can burst fixtures and crack holding tanks during hard freezes.
- Sanitation System: Fully pump out the holding tank at an authorized station. Close the intake seacock, pour marine antifreeze into the toilet bowl, and pump it through all macerators and hoses into the tank.
- Potable Water Systems: Drain freshwater tanks and the hot water heater completely. Open all faucets until they run dry, then run non-toxic marine antifreeze through all galley, head, and shower taps until clean pink liquid emerges.
- Raw-Water Auxiliaries: Flush livewells, washdown pumps, and air conditioning compressors with pink antifreeze to protect internal impellers and heat exchangers.
Tip
Install a hot water heater bypass loop prior to winterization. This prevents wasting gallons of expensive marine antifreeze filling the water heater tank.
How Should Marine Batteries Be Stored for the Winter?
Marine batteries should be fully charged, cleaned of terminal corrosion, disconnected at the negative terminal, and stored in a cool, dry area on a smart trickle maintainer. Keeping batteries properly charged prevents electrolyte freezing and severe sulfation.
| Battery Care Action | Best Practice Guideline |
| Terminal Cleaning | Scrub away corrosion and disconnect negative terminals. |
| Indoor Storage | Remove batteries if stored outdoors in sub-zero climates; avoid resting directly on bare concrete. |
| Maintenance | Connect to a smart trickle maintainer to preserve battery charge and lifespan. |
How Do You Prepare the Interior and Hull for Storage?
Preparing the interior and hull requires stripping out moisture-retentive materials, placing desiccants, scrubbing the bilge, and ensuring proper ventilation under covers. Removing organic matter and managing humidity stops mold, mildew, and pest infestations before they start.
- Strip Moisture-Absorbing Fabrics: Remove life jackets (PFDs), cushions, clothing, and towels from the vessel. Store expensive marine electronics indoors.
- Clean Bilge and Place Repellents: Scrub down the bilge, pump out standing water, and add a small amount of marine antifreeze to the bilge pump trap. Distribute moisture absorbers (e.g., DampRid) and commercial rodent repellents across lockers and cabins.
- Remove Garboard Drain Plug: If storing the boat on land, remove the hull drain plug and attach it securely to the steering wheel or throttle control. This enables rainwater or meltwater to drain freely.
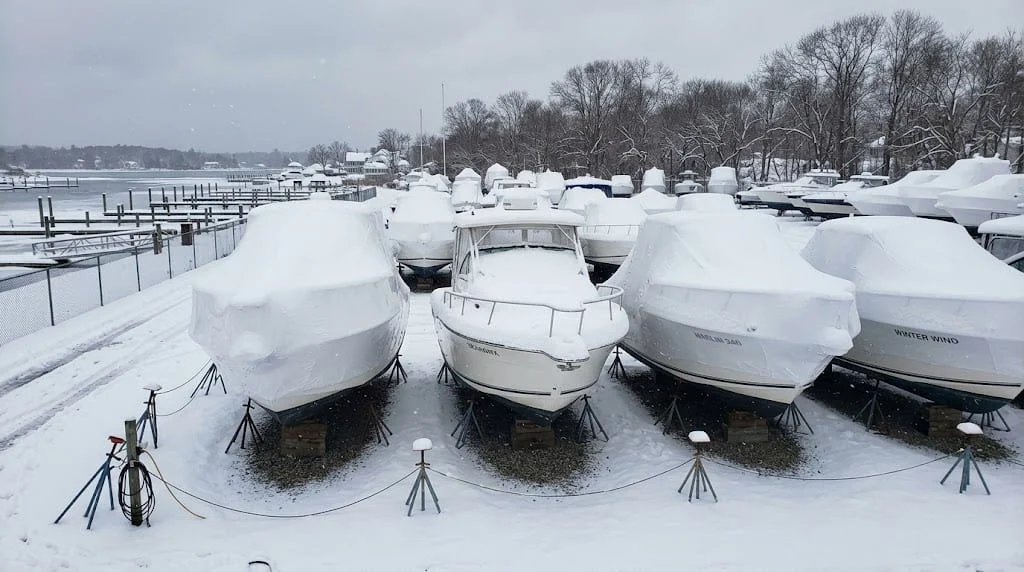
- Cover and Ventilate: Shield the boat with professional shrink-wrap, heavy canvas, or a framed tarp. Ensure air vents are installed; completely sealed covers trap moisture and cause fiberglass mold.
What Additional Steps Are Needed to Lay Up a Sailboat?
Laying up a sailboat requires removing all sails and canvas, backing off standing rigging tension, protecting the mast, pickling specialized systems, and correctly supporting the keel weight. Sailboats experience unique loads and environmental wear that require dedicated maintenance.
Sails, Canvas, and Rigging
- Sail & Canvas Care: Remove mainsails and headstay sails from furlers and booms. Inspect, fold, and store them in dry sail bags indoors. Remove and dry dodgers, biminis, and sail covers.
- Rigging Adjustment: If leaving the mast stepped, slightly reduce tension on stays and shrouds to accommodate metal contraction in cold temperatures. If unstepping the mast, replace expensive halyards with inexpensive sacrificial “messenger lines”.
Specialty Systems & Keel Support
- Saildrive & Water Makers: Inspect saildrive lower diaphragm rubber seals for cracking and replace gear oil. Reverse osmosis water makers must be flushed and “pickled” with a specialized chemical solution to protect delicate membranes.
- Keel Loading: When hauling out a sailboat, ensure the total weight of the vessel rests entirely on keel blocks. Cradle arms or jack stands are designed solely to balance the boat upright—overloading hull side-panels will fracture structural fiberglass.
Frequently Asked Questions (FAQ)
Why is it important to fill the fuel tank before winter storage?
Filling your fuel tank to roughly 95% capacity minimizes empty air space inside the tank where temperature changes cause condensation, water contamination, and fuel breakdown over winter.
Can I use regular automotive antifreeze in my boat?
No, you should never use automotive ethylene glycol antifreeze because it is extremely toxic to the environment and marine life. Always use non-toxic, marine-grade propylene glycol.
Do I need to remove my sailboat sails for the winter?
Yes, sails left on furlers or booms suffer severe UV damage, moisture rot, and destruction from nesting rodents over the winter months.
What is the purpose of “pickling” a water maker?
Pickling flushes a reverse osmosis water maker with a specialized chemical solution that stops bacterial growth and prevents permanent damage to delicate filtration membranes.
Conclusion & Next Steps
Taking the time to systematically preserve your boat’s engine, plumbing, electrical, and structural systems before winter protects your investment and ensures a stress-free spring launch.
Ready to protect your boat this off-season? Read through our complete checklist above to tackle your winterization project step-by-step, or contact a reputable service department to schedule your professional decommissioning service today!
