Stubborn stains require serious cleaning strategies, but always in a way that protects the boat.
By Peter Frederiksen | April 8, 2025
Tough Love Protect your boat from stains and damage with expert tips on hull cleaning, teak care, and maintenance from a seasoned Intracoastal Waterway captain.
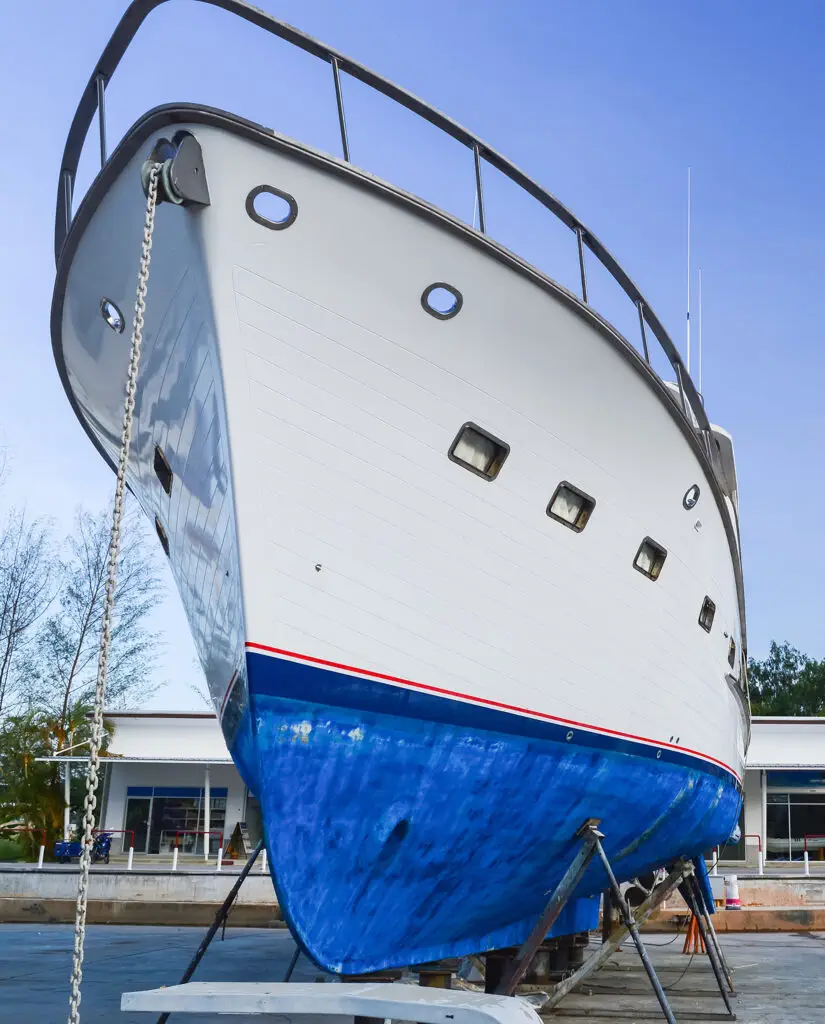
As a former professional captain, I spent thousands of hours delivering boats along the Intracoastal Waterway. The one constant chore during those many ICW miles was cleaning up the yellow-mustache hull stains that expanded upward from the waterline.
No matter how well a boat is maintained, stains are a constant peril. They are best addressed sooner rather than later. Bird droppings, rust, corrosion, acid rain, mildew, diesel soot, poor quality wash-down water, marine growths and countless more environmental offenders can require intensive cleanings and restorations.
Worse yet, a simple stain that gets ignored can reveal a more involved problem. A rust trail bleeding from a wooden hull once alerted me that the fasteners beneath the paint were rotting. On any modern boat, the number of holes drilled into the transom is astounding: outboard engine mounts, inboard engine exhaust drains, bilge pump discharge outlets, motor well, livewell and cockpit drains, transducers, underwater lights, trim tabs and more. If improperly bedded, each hole is a risk. Caulks and sealants age, and adhesive sealants can lose their grip over time, letting water in.
Stubborn stains that have migrated into gelcoat pores usually respond favorably to “on and off” liquid hull cleaners that remove waterline stain, algae, rust and engine exhaust residue. (These products are not designed for use on painted surfaces.) Care is necessary when using such acid-based cleaners, especially from the hull’s sheer to the waterline. Goggles, gloves and protective clothing are mandatory for safety. A vigorous water rinse completes the task, but sometimes a second application may be necessary. The drill follows with a soapy wash and rinse, and the need to re-wax, because the cleaners leave nothing behind to protect the gelcoat.
Test a small area of the cleaned gelcoat with wax before proceeding. If the wax resists being easy to remove by hand, then apply a mild cleaner wax followed by a few coats of liquid or paste wax. This should fully seal the pores from exposure to the marine elements. Midseason waxings also will help maintain and protect the gelcoat.
Whatever product you use to protect your boat will only be as good as the condition of the surface to which it is applied. A trick I use that helps keep the boat clean is to hose the exterior before leaving the dock. This removes residual grime and dust that collects while the boat is in the slip. The rinse flushes the grit completely, rather than have it slowly drip overboard with the salt spray encountered underway. Later, back at the dock, a gentle soaping with a neutral, phosphate-free detergent will do a good cleaning job without harming the wax that protects the gelcoat.
Even with routine washings, after it rains you may notice dark streaks in vertical areas. No need for alarm: This is grime that has tracked into the wax. It generally wipes off with a wet chamois or a light soaping and rinse.
Topside metal fittings typically clean up with a dab of metal polish. Buff it with fine bronze wool or a nylon scrub pad. Another option is a liquid rust remover such as Whink or Goof Off, or a gel product like Davis FSR. If the stain reappears, it could mean a problem with the quality of the fastener or fitting, or the lack of sufficient sealant. If the fastener screws into a wood core, the wood can be wet.
Prevention with surfaces beyond gelcoat is also key. A good example is cleaning exterior teak properly.
Teak is a dense wood with soft and hard grain. Too much scrubbing with gritty cleansers removes soft grain, leaving an uneven surface. Liquid teak cleaners are generally based around a two-part program. Step one chemically draws dirt and grime from the wood grain with a soft brush or scrub pad. Rinse before proceeding to step two, which brightens the wet wood. After another freshwater rinse, the teak dries into a like-new golden tone.
However, the impurities freed from the grain can discolor and stain the adjacent fiberglass and painted surfaces along the hullsides and transom. It is imperative to flush any surfaces below the teak with generous amounts of fresh water before, while and after applying the teak cleaners.
Savvy skippers also tape anodized metal fittings (such as bow rail stanchion bases and cockpit ladder steps) to protect them from caustic teak cleaners. Frugal owners might opt for a powder cleanser, but oxalic acid will damage anodized surfaces. One hapless owner at my marina found this out the hard way when the cleanser dulled his metal fittings. He compounded the damage with a second pass because he thought the original treatment did not do a good job. It ruined the anodizing altogether.
That poor fellow has become my poster boy when I tell people to read the label twice on the container of any cleaner, paint or chemical before applying it to their boat.
This article originally appeared in the March 2025 issue of Passagemaker magazine.
Even if you live in an area that enjoys a warm climate all year round, you’ll want to download our Spring Start-Up Checklist before the next boating season begins. It lists out all the chores that need to take place, from fuel systems to safety gear inspections, which should happen on an annual basis whether you winterize your boat or not.
For those of us who do winterize, however, spring commissioning requires a number of additional actions to reverse the process.
De-Winterizing Your Boat for Spring
The major systems that need de-winterizing include:
Engines
In addition to de-winterizing systems, other spring commissioning tasks may include:
De-Winterizing Your Boat’s Engine
The exact process you follow to de-winterize any marine engine will be different depending on the type of engine, the manufacturer, and the model. The biggest differences are between outboard engines, and inboards or stern drives.
In the case of outboards, the main task is generally giving them a water supply, starting them up, and burning away the fogging oil you (hopefully!) used to ease its winter slumber. That fogging oil usually makes some smoke and the engine may not run as smoothly as usual, but don’t let this worry you. And as soon as the smoke’s cleared out, you’re ready to do the annual maintenance and inspection chores listed out in that Spring Start-up Checklist.
Inboard engines, including sterndrives, have a different winterization process, and will probably take a bit more work to prep for the season. There may be drain plugs you removed which need to be put back in, cooling systems may need to be flushed, and seacocks may need to be opened back up. This can vary quite a bit from engine model to engine model, so either make sure you have the owner’s manual handy or consider taking the boat to a pro for its spring commissioning.
Spring Commissioning for Plumbing Systems
Boats that have freshwater systems, heads with holding tanks, sinks, and showers, should have been treated with antifreeze in the fall. This means that now you’ll need to flush these hoses and lines with freshwater, until you’re absolutely sure all the antifreeze has been washed away.
Spring Commissioning for Batteries & Electrical Systems
In most cases, the only thing you’ll need to do to get your boat’s marine battery ready for the new season is make sure it’s in place, hooked up properly, and fully charged. Many people remove the batteries from the boat and put them on a maintenance-charger over the winter, so in this case they’ll need to be put back into the boat with the leads properly connected. Even if your batteries stayed aboard, however, don’t neglect to hook up a charger before you try launching the boat—the number-one problem boaters report encountering on a spring shake-down cruise is a low or dead battery.
Additional Steps for Spring Commissioning Your Boat
You’ve gone through the Spring Start-Up Checklist and de-winterized your boat? Excellent—but there are a few other spring commissioning chores that may be in order.
Winter Cover
Cleaning & Waxing
Painting
Teak
Teak is another item that requires some spring care.
Ready to Hit the Water?
Okay: so you’ve now completed the de-winterization and spring commissioning process. Next comes the fun part—it’s time for a shake-down cruise. This is an important “chore,” if you want to call it that, because this initial cruise will give you the chance to discover any issues that may have arisen over the winter.
Now’s the chance to find out about them so there aren’t any unexpected surprises that put a damper on the fun days of boating to come, which makes the shake-down cruise a critical part of the process of getting your boat ready for the season. Yes, let’s call it a chore, even though for the first time in months you’re about to feel the wind whipping through your hair, the sunshine and spray on your skin, and your very own boat underfoot. Somehow, we think you’ll manage to suffer through this one.
Many thanks to our friends at DISCOVER BOATING for this article.
Eventually the gray days of February will mellow into spring-like temps and it’ll soon be time to bring your boat out of storage and prep for use in the summer. Just as it’s recommended that boat owners winterize their boat before putting it into storage, it’s also necessary to de-winterize it. That means carefully inspecting it and making any repairs after bringing it out of winter boat storage. Here’s how to get started on the process of getting a boat ready for the summer.
GET THE ENGINE READY FOR USE
After spending months in winter boat storage, the engine might need some attention.
INSPECT BELTS AND HOSES IN THE BOAT
It’s common for hoses, cables and belts to become brittle when the boat has been in winter storage for months. This is why part of de-winterizing the boat is checking all these components to make sure they’re not too hard, cracked or frayed. Also, ensure all belts in the boat still have a tight fit around pulleys and are not too worn, and check to make sure none of the steering cables are corroded. If they are, it’s time to replace them.
CHECK THE HULL AND PROPELLERS
Another part of bringing a boat out of storage after winter is over is ensuring the propellers are still in good shape. They should be free of any dings, cracks or dents, and they shouldn’t be bent. Otherwise, they could vibrate the whole boat or even damage other parts. It’s also important to look over the entire hull, making sure all screws are still tight and there are no cracks in the surface. Replace any drain plugs, as well. If the hull looks good, it’s time to clean it to make it look even better now that winter boat storage is over.
DOUBLE CHECK SAFETY GEAR ON THE BOAT
Finally, it’s important to make sure the boat is well stocked with safety essentials.
The final step to de-winterizing the boat is to clean the interior and exterior before bringing it out on the water.
Thanks to our friends at GoldEagle marine products for this article.
Decommissioning a yacht for winter involves several important steps to protect the vessel from the harsh weather conditions and ensure that it remains in good condition during the off-season. Below is an article to guide you through the decommissioning process. By following this comprehensive checklist, you’ll help protect your yacht from the winter elements and ensure that it’s ready when the warmer weather returns. Keep in mind that specific requirements may vary based on the type of yacht, its construction, and the local climate, so consult your yacht’s manual and consider seeking professional advice if needed.
“Decommissioning Checklist” ~ By Charles Mason, SAIL Magazine
https://www.sailmagazine.com/diy/decommissioning-checklist
By Bob Marston
Partner, Wellington Yacht Partners
When surveying a sailing yacht for purchase, the condition of the standing rigging is always inspected closely. After all, it serves one of the most important functions onboard, keeping the mast up! It is therefore imperative when marketing your boat for sale that the rigging is in good working condition.
There are many factors that can determine the life expectancy of standing rigging. Fortunately there are some great industry guidelines that all rigging companies refer to, for both wire and rod rigging condition.
Most surveyors will tell you standing rigging is considered to have a 10 year or 40,000 nm lifespan. Other factors such as environment, amount of usage, application (i.e. cruising yacht or racing yacht, offshore vs. coastal usage) and maintenance can have a great impact on the standing rigging condition and increase or decrease its useful lifespan.
For seasonally-used yachts such as those in New England, the amount of real time on the standing rigging is considerably less than that of a yacht used in the Caribbean. For yachts with masts removed for storage each winter the rigging is inspected easily, whereas a cruising yacht being used 12 months a year may only have the mast out every five years, so rigging inspections are done with the mast in place.
I advise my seasonal New England clients who store their boats “mast-in” to have the standing rigging inspected every spring and to keep the report handy for any potential Buyer to view. For cruising yachts that travel north/south for winters in the tropics, it is prudent to have the rig and rigging inspected before going offshore and to keep records available.
The good news is, for most yachts a thorough rigging inspection is not expensive. It is often just an hour or two of labor by a rigging company, plus the time it takes to create a report. This is a small price to pay to ensure a yacht’s rigging is fit for purpose. Knowing your mast and rigging is sound will not only give you confidence each time you head out for a sail, but it will assure a future potential Buyer your boat has been cared for professionally.
By Bob Marston
Partner, Wellington Yacht Partners
Is hiring professional crew right for you?
Any boat, no matter how big, is going to require maintenance and care. For most owners this is something they either take on themselves or engage a professional boatyard to do. Others will often consider the options of either a shore-based care service or hiring full-time crew.
Shore-based care has become a very popular option, especially as yachts are becoming easier for consumers to operate on their own. With this service you are essentially hiring the skills of a professional captain on a part time basis. Maintenance and care levels can be ordered “a la carte,” based on need. Most shore-based yacht care professionals tend to be ex-crew. They look after a couple of clients’ yachts, sharing their hours between each customer. Examples of different levels of care can be something as simple as weekly cleaning, to delivering the yacht south to the Caribbean for a season. Many of our clients choose this option, and you will find that wherever there are yachts, there is shore-based care.
For owners who require a higher level of service, there is the option of hiring full-time crew. As one would expect, the number of crew a client may require is often directly related to boat size. The owner of a 56-footer may only need a single captain, whereas the owner of a 100-footer may require as many as five full-time crew.
There are many qualified candidates available who can take excellent care of your yacht. The real success in hiring crew is making sure they get along well with your family and are a proper fit for your personality. A good crew can cater to just about anyone, and they will ensure you have a great time while aboard your yacht.
Finding the right crew is much like hiring a manager for your business. Candidates need to be vetted and references checked. The marine industry is relatively small, so referrals and networking go a long way.
At Wellington Yacht Partners we keep in touch with professional crew and shore-based yacht care services all over the world. We have great success assisting our owners in finding the right people to match their needs.